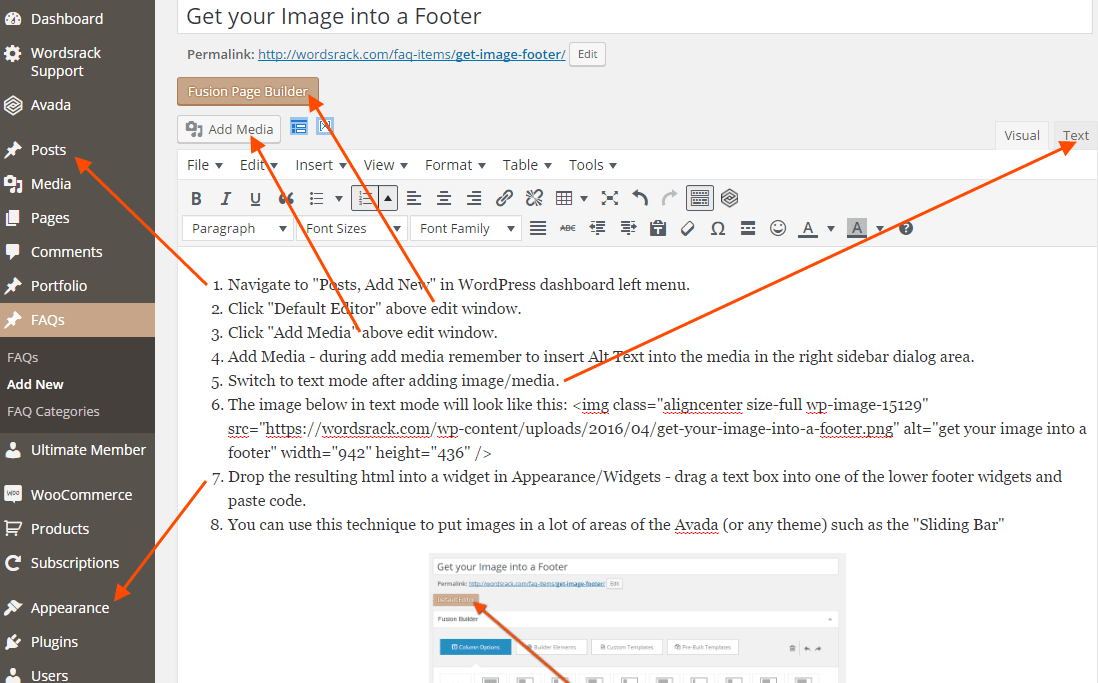
- Navigate to “Posts, Add New” in WordPress dashboard left menu.
- Click “Default Editor” above edit window.
- Click “Add Media” above edit window.
- Add Media – during add media remember to insert Alt Text into the media in the right sidebar dialog area.
- Switch to text mode after adding image/media.
- The image below in text mode will look like this: <img class=”aligncenter size-full wp-image-15129″ src=”https://wordsrack.com/wp-content/uploads/2016/04/get-your-image-into-a-footer.png” alt=”get your image into a footer” width=”942″ height=”436″ />
- Drop the resulting html into a widget in Appearance/Widgets – drag a text box into one of the lower footer widgets and paste code.
- You can use this technique to put images in a lot of areas of the Avada (or any theme) such as the “Sliding Bar”
- We recommend saving a “Sandbox” post in “Draft Mode” so you can refer back to it and experiment even more. Enjoy!